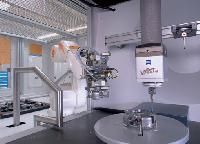
RoboMax System Automates Quality Control
The RoboMax system, developed by Carl Zeiss, does not require an operator and can run fully automatically 24 hours a day, 7 days a week. Parts are automatically fed, measured and sorted. Measurement logs permit verification of the quality at any time. RoboMax can be configured as needed. Different coordinate measuring machines (CMM) and surface measuring machines from Carl Zeiss can be integrated. Equipped with standardized controllers and interfaces, the measuring machines receive the parts being inspected via loading systems. Data matrices and RFIDs are used to clearly identify the parts. Depending on the part, FACS (Flexible Automation and Control System) software loads the corresponding measuring program from CALYPSO measuring software from Carl Zeiss. Such systems are intended for automotive customers and others with high part throughput and automation levels. Because the loading systems and robots on the market today can move very quickly, the speed of the measuring machine is particularly important for part throughput. The inline CMMs in the MaxLine from Carl Zeiss-GageMax and CenterMax-are equipped with probes featuring Navigator technology. They not only measure the features more accurately, but also up to 50 percent faster than conventional probes, according to the company. These measuring machines, which work reliably at temperatures from +15 degrees C to +40 degrees C, are thus suitable for integration into RoboMax.


