The 34th annual Control international trade fair for quality assurance (QA) innovations is going on now in Stuttgart, Germany, where doors opened on the 3rd and will continue through the 6th of May, 2022. In six exhibition halls, expert visitors from around the world will experience a showcase of innovative solutions at the event in the fields of vision technology, image processing, and sensor technology, as well as measuring and test technology.
“Our trade fairs are characterized by direct practical relevance and concrete applicability,” explains trade fair promoter Bettina Schall, managing director of P. E. Schall GmbH & Co. KG. “Control is setting the pace where quality assurance is concerned and will provide our expert visitors with everything they need to excel in international competition with outstanding QA once again this year.”
Control has grown to become one of the most indispensable events for the global QA sector. Customers and other constituents meet and discuss new approaches and challenges for QA in a professional exchange of ideas and experience. This is enormous after the compulsory 2-year hiatus due to the pandemic. Automation and digitalization, contactless processes, remote services, small lot sizes, zero-defects manufacturing, data analysis, and end-to-end process traceability have brought a new urgency to quality inspection and QA for all processes.
QA solutions have never been as relevant as they are today. That’s why the Control 2022 on-site trade fair is the place to be when it comes to measuring and test technology, materials testing, analysis equipment, vision technology, image processing and sensor technology, as well as weighing and counting technology. The exhibitor forum will provide expert visitors with the opportunity of finding out more about the product and service portfolios and the technological expertise offered by individual companies, such as the new solutions highlighted below that are being unveiled by Gleason and Klingelnberg.
Gleason presents the new 300GMS nano at Control
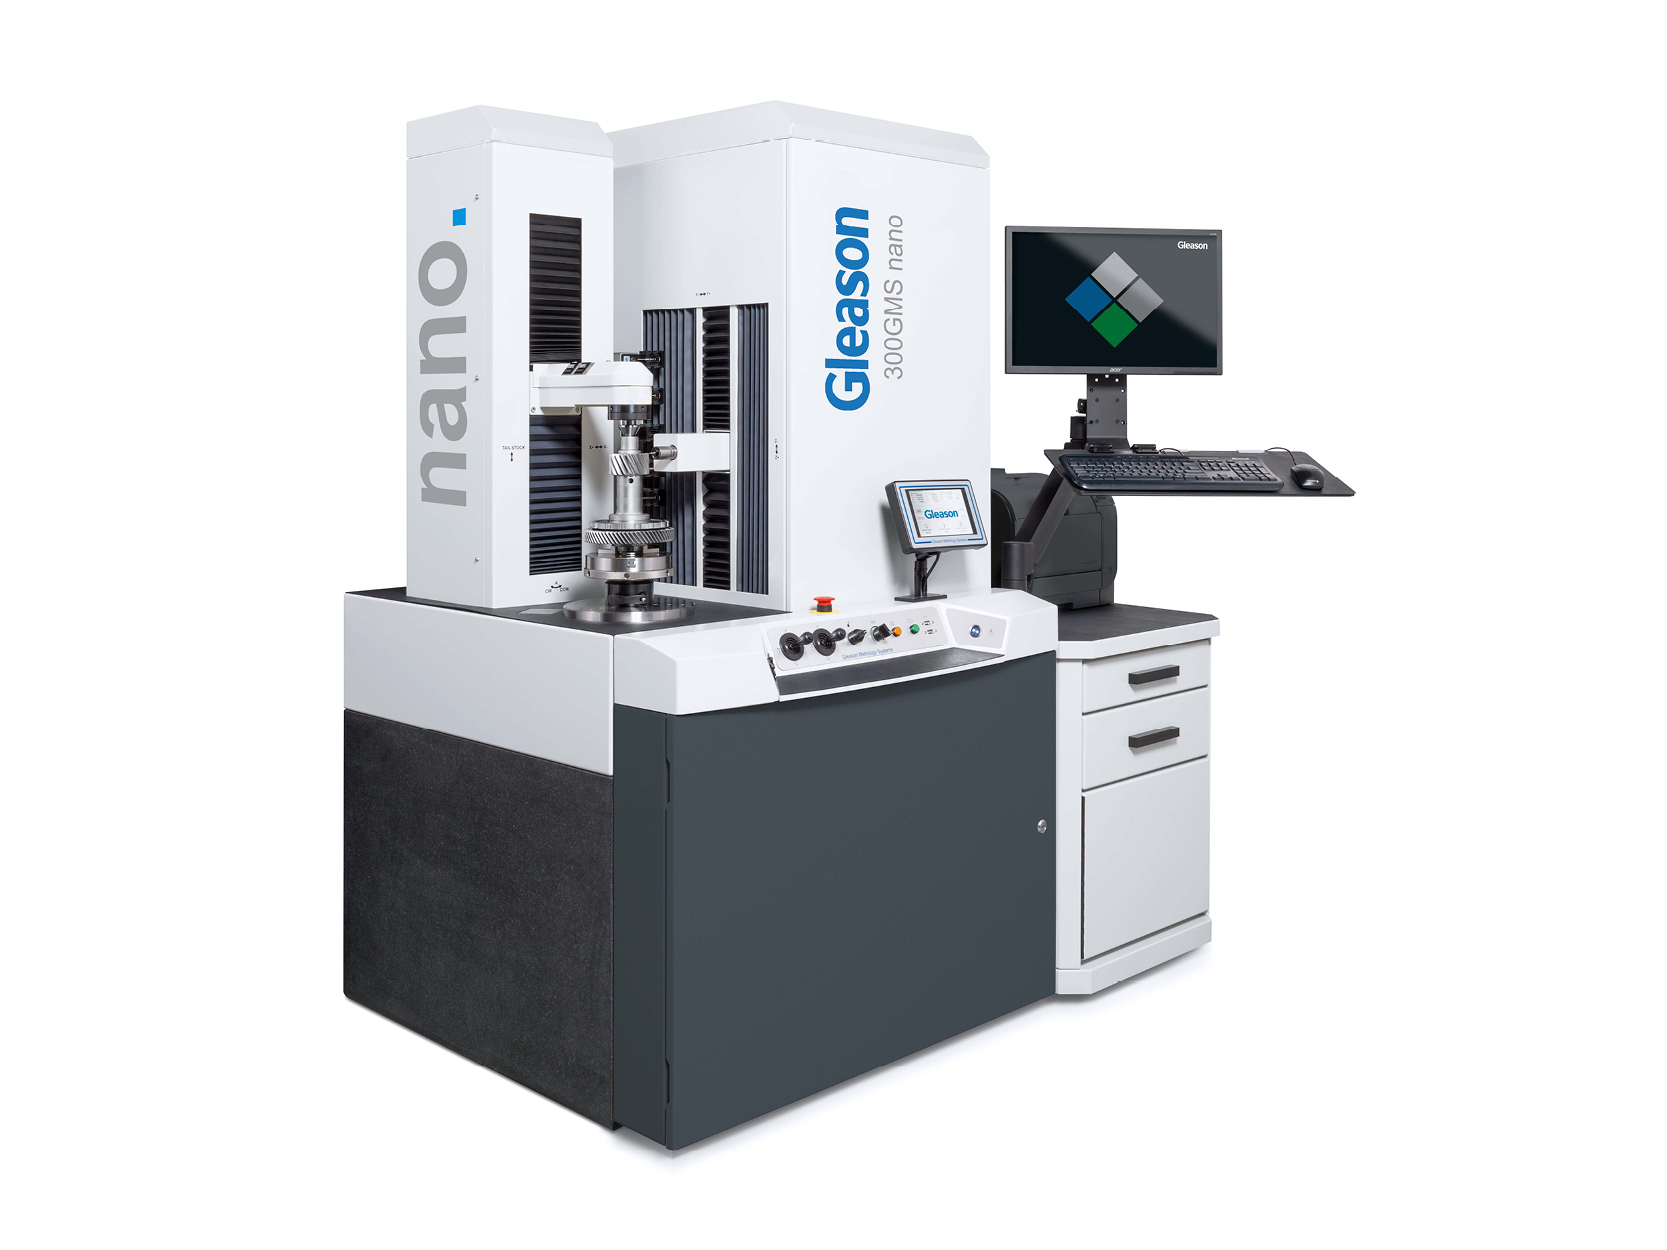
At Control, Gleason presents a world-first of its new 300GMS® nano Gear Metrology System, their latest development to meet the challenges of extreme gear quality and minimum gear noise demands.

The capability of measuring gears at the sub-micron level, executing advanced waviness analysis, and evaluating gear noise using the most advanced analytical tools, makes the 300GMS nano ideally suited to support automotive e-drive production with minimum noise requirements. The 300GMS nano covers the full range of modern gear inspection capabilities, as well as fine pitch gear inspection and CMM measurement. With the 300GMS nano, users are now able to measure surface finish at sub-micron level with a skidless probe; analyze waviness for profile, lead, and pitch; and execute noise analysis with sophisticated software tools. The 300GMS nano is equipped with high accuracy SP25 3D scanning probes with a broad range of styli, including its own stylus calibration library, meeting the most common roughness parameters as defined by DIN, ISO, ANSI, and others. The 300GMS nano also integrates 3D measurement and analysis capabilities typically offered by a CMM.
In addition to gears and other rotary parts, the 300GMS nano inspects a wide range of gear cutting tools including hobs, skiving, shaper and shaving cutters, bevel cutter stick blades, and most broaches and rack cutting tools. The system comes with Gleason’s patented Advanced Operator Interface (AOI), which enables users to record video memos, leave voice messages, monitor environmental conditions, and read bar and QR code information directly into the machine. The 300GMSP nano features a host of integrated systems that compensate for typical production floor thermal and vibratory dynamics as well as contamination.
The machine uses the latest GAMATM 3.2 Applications and Control Software, fully compatible with Windows, connecting easily to customers' servers. GAMA also includes SPC data acquisition software and Gleason Connect® Remote Support Services.
The GRSL Gear Rolling System with integrated Laser Technology offers revolutionary in-process gear inspection of up to 100% of gear production, setting a new standard for applications requiring high-speed, high-volume testing. It provides both double flank roll testing as well as laser inspection to provide measurement on all teeth in just seconds. GRSL is available in manual, semi-automatic or fully automatic configurations depending on the manufacturer’s requirements and measures external cylindrical gears up to 250 mm in diameter and ranging from .4 to 7.2 module. It provides analytical output on all teeth for profile, lead, and index with functional characteristics including nick detection, total composite variation, total runout, tooth to tooth average, DOP, average circular tooth thickness, and more. Capabilities also include integrated gear noise analysis tools, making the GRSL ideally suited to meet automotive e-drive requirements.
Gleason’s Closed Loop enables both the GMS Series and GRSL to send inspection results directly to Gleason production machines, including skiving, grinding, and honing machines, for auto-correction of production variables without the need for operator intervention.
Directly feeds back inspection results to KISSsoft design software for fast and efficient design adjustments in the prototyping phase. Easily network selected Gleason manufacturing machines with GMS Metrology Systems to achieve continuous high quality and productivity.
For more information, visit: GLEASON
Klingelnberg unveils innovative solutions for mid-sized gears
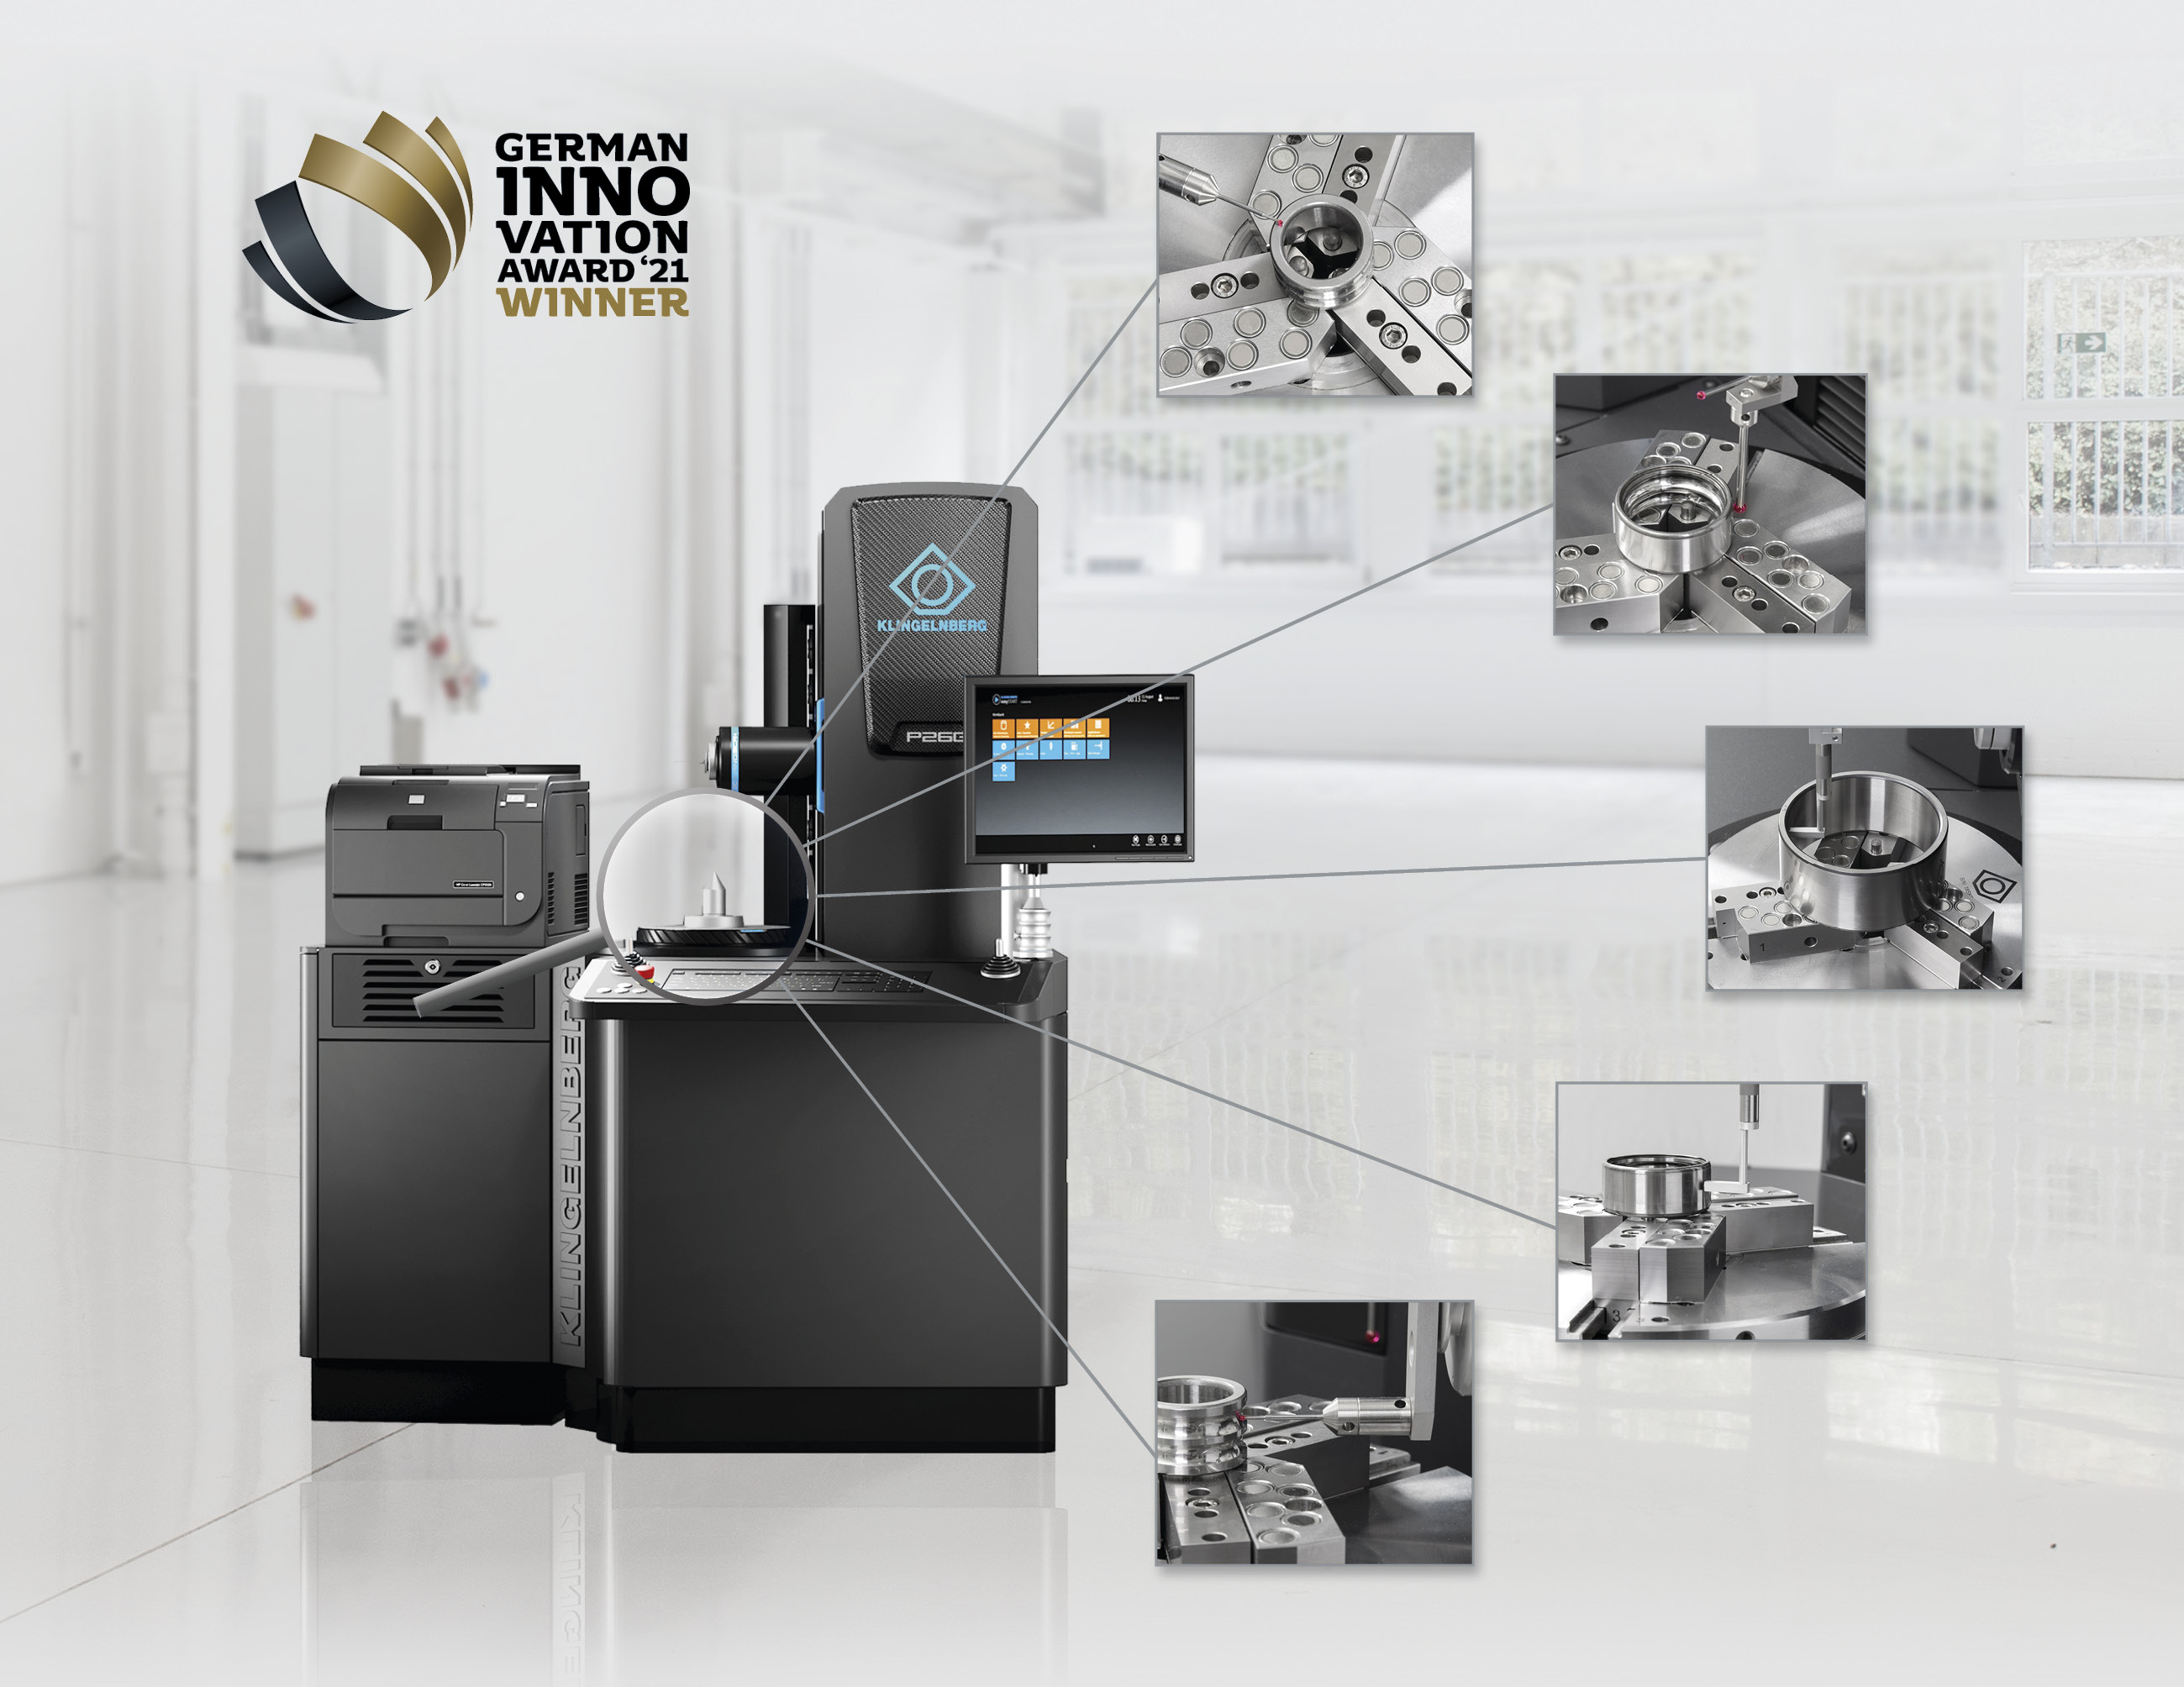
At this year’s Control, Klingelnberg will be unveiling innovative solutions for mid-sized gears. The company will also be presenting optical measuring technology on its P 40 precision measuring center, while the P 26 precision measuring center will be used to demonstrate their Done-in-One principle for different measurement processes in a single operation.
 Done-in-One for different measurement processes in a single operation.
Many measurement tasks are possible on one machine. They execute the entire process in a single automated sequence directly on the shop floor. Particularly when producing larger series of rotationally symmetrical drive elements with their many GD&T features, it is important to monitor the process in real-time and as close as possible to the production environment. The P-series has proven itself in these types of shop-floor applications.
Klingelnberg Hybrid Metrology is a combination of tactile and optical measuring technology. An optical sensor system developed specifically for gear measurement, as well as the rapid changeover between the 3D Nanoscan tactile sensing system and the Hispeed Optoscan optical sensor, enable flexible, fast, and highly precise measured value acquisition under all conditions. All Klingelnberg precision measuring centers in the P 26 to P 100 series can be optionally equipped or retrofitted with an optical solution.
The increasing cost pressure on large components for wind power requires new technologies that will enable proven principles for high-volume and mass production of smaller components to be transferred over to large components. To meet this need, Klingelnberg has developed a new precision measuring center. The P 152 is the latest addition to the family of Klingelnberg precision measuring centers. It is capable of measuring components with a maximum outside diameter of 1,520 mm and workpiece weights up to 8,000 kg with the usual precision. Despite this high workpiece weight, no special foundation is required because the Klingelnberg design engineers succeeded in extending the machine concept of the small and medium series to the large component dimensions. The inherently rigid machine bed with a 3-point support plays a key role here. The bed design and floor support have been so cleverly selected that even when loaded with workpiece weights of up to 8,000 kg, the angular position of the individual machine axes to each other does not change significantly. With its broad range of varied workpiece diameters and measurement tasks, this measuring device is also ideal for contract gear manufacturers. This ensures high precision across the entire component spectrum from smaller to larger gears, and also dimension and form measurements. The 3-point support enables the integration of an active vibration platform into the machine bed. This means that even the low-frequency vibrations from the shop floor can be safely absorbed.
 The P 152 offers an innovative solution for gears with a maximum outside diameter of up to 1,520 mm and weighing up to 8,000 kg.
Because the machine is isolated from these vibrations, the P 152 can be located on the normal shop floor without having to build an inherently vibration-isolated foundation. Despite this, it is ensured that all changes visible in the measuring results do come from the component and are not induced by the ambient conditions. The P 152 thus acts as a bridge for medium-sized gears such as planetary gears used in wind power and combines dimension, form, and position measurements with gear measurement, making the operating principles used in high-volume and mass production applicable to large gears as well. Form measurements, such as roundness and cylindricity measurements, are becoming increasingly important on machine elements. The P 152 offers all the possibilities of the Done-in-One principle in the mid-sized diameter range as well.


